###基本Ionic环境搭建
- 基于node环境,使用npm来安装环境,首先需要安装node。
npm install -g ionicnpm install -g cordovaionic info,这个会显示出当前所有的ionic环境搭建情况。
###开始一个新的Ionic项目
- 官网提供了几个示例项目如:tabs、sidemenu等。
- 开始官方的示例项目:
ionic start [myProjectName] [tabs/sidemenu],这样会从github下载示例代码。 - 开始自己的新项目:
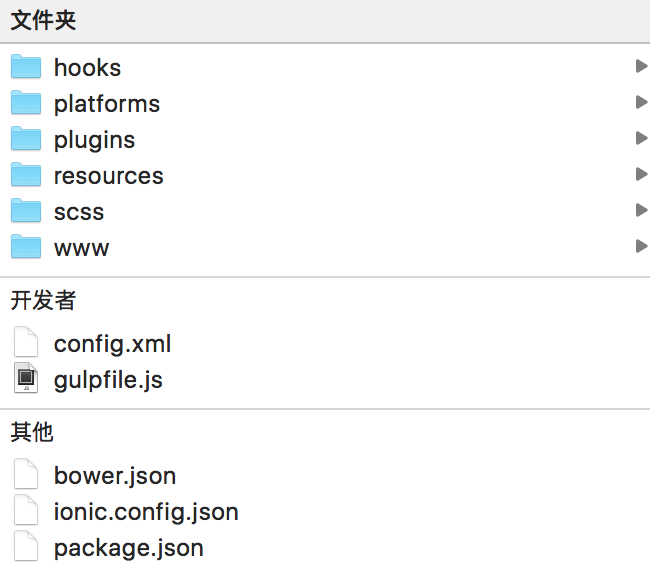
ionic start [自己的工程名] blank,blank表示空白模版,这样会从github下载空白模版。 - 大致会生成如下内容
|
|
###运行Ionic项目
- 切换到项目目录,也就是[myProjectName]目录:cd [myProjectName]
- 构建平台:
ionic platform add ios/android,如果遇见问题,可以先使用:ionic hooks add - 移除平台:
ionic platform remove ios/android - 编译:
ionic build ios/android - 开始编译项目,编译完成之后用Xcode打开开发目录下platform->ios->myIonic.xcodeproj的项目文件,Xcode中选择要运行的虚拟机版本并执行快捷键cmd+R运行虚拟机,虚拟机打开后会自动运行你应用。
###Ionic项目编码
- www/index.html是程序入口文件,Ionic针对移动端自定义了一套样式库,并且使用Angular的指令封装了各个模块。在index.html中调用插件的方法需要引入这两个js文件,
<script type="text/javascript" src="cordova.js"></script><script type="text/javascript" src="cordova_plugins.js"></script>
###Cordova插件
- Cordova插件开发步骤
|
|
plugin.xml(配置文件)
关键标签:
1234<js-module name="JustalkPlugin" src="www/justalk.js"><clobbers target="justalk" /></js-module>name是插件名,src指向www目录下的js文件,target定义一个调用js文件中方法的对象。关键标签:
123456789101112131415<platform name="ios"> //表明是iOS平台<config-file target="config.xml" parent="/*">// target 和 parent 在iOS平台可以直接这样写<feature name="justalk"><param name="ios-package" value="JustCall" /><feature><config-file><header-file src="src/ios/JustCall.h" /><source-file src="src/ios/JustCall.m" />// 区别于android,iOS没有target-dir属性</platform>
src中编码底层文件,定义方法,并与www/justalk.js中的方法对应起来。
www/justalk.js
- 在这里写上JS方法,并暴露给web工程使用,使用CommonJS规范编码。
- 插件编码完成后,就是使用命令行来生成Cordova插件
- 首先切换到工程目录,使用命令:
cordova plugin add [插件的绝对路径] - 在工程目录下移除插件:
cordova plugin remove [插件名]
- 首先切换到工程目录,使用命令:
###Xcode专题
ionic build ios运行之后,会编译出Xcode使用的文件(xxx.xcodeprej),接着可以使用Mac系统上的Xcode来进行开发。ionic run ios,会自动(重新)将www的部署到ios平台。Xcode的项目配置
- Framework,添加系统库,或者第三方静态库,比如xxx.framework、xxx.a、xxx.tbd等文件,都需要在
TARGETS->Build Phases下的Link Binary With Libraries中添加,接着会在工程左侧的Frameworks目录显示出来。 - Bundle文件,里面打包了许多资源文件,SDK有时会携带这样的文件,可以直接将其添加到Frameworks目录下,在Frameworks目录上右键点击,选择
Add Files to ...,即可。那么会在TARGETS->Build Phases下的Copy Bundle Resources中显示出来。 - Prefix.pch文件,可以用来存储共享信息,比如设备屏幕的宽度,高度,版本号等等公用信息。如果添加了这个文件,那么需要在
TARGETS->Build Settings->Apple LLVM8.0-Language中设置Precompile Prefix Header和Prefix Header - 如果添加了库文件,头文件,lib文件,需要设置
TARGETS->Build Settings->Search Paths下的Framework Search Paths、Header Search Paths和Library Search Paths。一般使用定义宏来编写路径,方便运行在其他电脑环境。比如$(PROJECT_DIR)表示当前平台目录路径。 - 其他重要配置项:
TARGETS->Apple LLVM8.0 - Preprocessing下的Preprocessor Macros,可以将其设置为DEBUG=1 ZPLATFORM=ZPLATFORM_IOS OPENSSL_CONF_FILE_IOS_ARM64;TARGETS->General->Deployment Info下的Deployment Target设置为较低的版本,同时与PROJECT->Info->Deployment Target下的iOS Deployment Target保持一致。
- Framework,添加系统库,或者第三方静态库,比如xxx.framework、xxx.a、xxx.tbd等文件,都需要在
注意,在Xcode中有些是目录不是真实存在的,只是一个虚拟目录,仅仅表示引用。
- 关于程序不能运行时不能全屏的问题分析解决:构建IOS程序时,是使用xib作为启动页面的,但是xib只能使用在Xcode8.0以上的系统,以前的系统还是需要在lanchImage里面设置启动图片,而且启动图片还需要分为不同的倍图和对应的设备。重点:在工程找到
Images.xcassets这个文件夹,Finder中去查看,便会发现其中有许多的图片文件,这真是各个分辨率需要使用的。如果没有,请生成,并加入到其中。如果有了的话,你在Xcode中点击这个文件夹,你会发现右侧中会点亮相应的图框,表示已经添加了的不同分辨率的图片。接着,还需要在工程中设置,进入到这里TARGETS->General->App Icons and Launch Images下的Lacnch Images Source选项添加这个Image即可。 - 关于IOS的头部区域占用页面20px的问题,只需要在app.js中添加
ionic.platform.fullScreen()即可,具体请 点击这里 - 关于IOS程序WEB页面调试的方法,详情请 点击这里
###更新
- 在www目录下的index.html是主要的入口文件,里面是这样的
|
|
- 在templates目录下的模版html会被渲染在
<ion-nav-view>中 <ion-nav-bar>,会创建一个 topbar,我们可以在其中加上一个 回退的 button,类似这样,<ion-nav-bar><ion-nav-back-button></ion-nav-back-button></ion-nav-bar><ion-nav-back-button>不仅可以自定义样式,还可以自定义点击行为。<ion-view>视图内容的容器,和一些导航信息。<ion-content>可以控制页面,比如页面的滚动下拉等效果。
|
|
app.controller(controllerID, [arg..., function(arg...) { } ]);
###APP语音功能
- cordova提供两个插件,cordova-plugin-media-capture和Cordova-plugin-media,Cordova-plugin-media-capture 是使用调用手机系统的录音软件,无法自定义UI;cordova-plugin-media 是调用原生代码,高度自定义。
- 注意点,android 和 ios 的
src的写法是不一样的,src使用cordova.file.*来写,但是,IOS是要去掉头部的file://这段字符串,var src = cordova.file.tempDirectory.substring(7) + name + ".wav"; - android 和 iOS 的录音拓展名也是不同的,iOS只能是
.wav,android 是.amr。 - 录音上传时,使用 cordova-plugin-file-transfer 插件,但是上传的src必须使用
cordova.file.*这种 Filesystem写法。 - 还有一个问题,
.wav文件太大,如何解决?